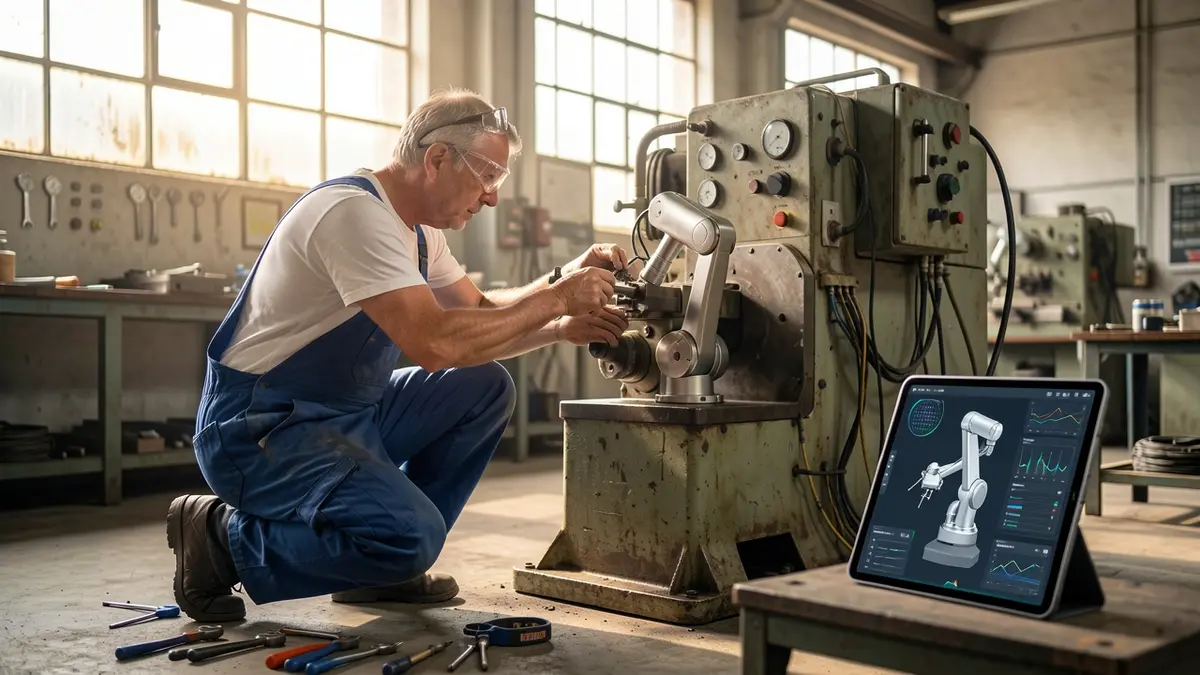
Many SME owners face the dilemma of aging production equipment that still works but lacks modern efficiency. Replacing whole machines is expensive and disruptive.
The quickest solution is to retrofit those machines with robotics and AI, extending their life while adding smart capabilities.
Why retrofit old machines instead of buying new
Retrofitting extends the service life of existing equipment while avoiding the capital outlay required for a brand‑new production line. For small‑ and medium‑size enterprises, the initial investment in a new machine can exceed the annual revenue of the whole operation. By adding a modular robotics kit and custom control software, the same machine can achieve higher throughput, better repeatability and lower per‑unit cost without the financial shock of a full replacement.
Economic upside
Modern robot kits, such as the Carpathron Avatar and the Baby Carpathron ESP32‑CAM platform, integrate with legacy hardware through simple HTTP commands. This means the existing PLC or manual control panel can remain in place while the robot handles repetitive motions or material handling. The cost of a robot kit plus a few hours of software integration is typically a fraction of the price tag of a new CNC or assembly station. Moreover, the retrofit can be staged: start with a single axis, evaluate the gain, and expand as budget allows.
Because the retrofit uses the original machine’s mechanical structure, depreciation continues on the same asset, preserving tax benefits and avoiding the need to write off a new purchase. Maintenance contracts also stay unchanged, reducing administrative overhead.
Environmental impact
Keeping a machine in service cuts the demand for new raw materials, machining and shipping associated with manufacturing a replacement. The embodied energy of the original equipment is retained, while the added robot kit is lightweight and built from recyclable components. This aligns with circular‑economy principles and can help SMEs meet sustainability targets without complex certification processes.
Retrofitting also reduces waste. Instead of discarding a machine that is still structurally sound, the upgrade replaces only the outdated control layer. The result is a lower carbon footprint per produced unit, which can be quantified in internal reporting and used for marketing green credentials.
Qubitpage’s role in the retrofit process
Qubitpage provides a Windows‑based AI‑assisted application, Carpathron Robotics & Coding, that can detect the type of board inside a machine (Arduino, ESP32, Raspberry Pi, etc.) and generate the necessary firmware. The app guides the user through uploading the code and configuring the robot’s motion parameters, turning a complex integration into a series of concrete steps.
For hands‑on control, the Carpathron Avatar app on Meta Quest 3/3S lets operators steer the robot by moving their head, while WhatsApp text or voice commands enable remote supervision. These tools illustrate how Qubitpage’s robotics services can be layered onto existing machinery without extensive rewiring.
Examples of deployed kits are listed on the Robotics page, showing how the Muse Carpathron agent and the Baby Carpathron robot car have been attached to legacy conveyors, packaging tables and inspection stations. The documented cases demonstrate measurable gains in cycle time and operator safety, reinforcing the business case for retrofit over replacement.
Assessing your equipment for a successful retrofit
Mechanical compatibility check
Start by measuring the mounting points of the existing actuator, motor, or conveyor. Record bolt patterns, shaft diameters, and travel limits on a simple spreadsheet. Compare those dimensions with the specifications of the Carbone Carpathron modules listed on the Products page. If the original frame uses a standard 40 mm rail, you can attach a Carpathron servo arm directly with a few M4 screws; otherwise, design a 3‑D‑printed adapter that matches the measured offsets.
Next, verify load capacity. Use a hand‑held dynamometer to read the maximum force the original drive delivers, then confirm that the Carpathron motor’s torque rating exceeds this value by at least 20 % to allow for wear and future upgrades.
Control interface audit
Identify the communication protocol of the legacy controller. Most older machines expose RS‑232, PWM, or simple digital I/O. Connect a laptop to the port and run a serial monitor at 9600 baud; note any command strings that appear when the machine starts. If the device uses a proprietary board, the Carpathron Robotics & Coding app can scan the PCB via a USB‑to‑UART adapter and automatically recognise Arduino, ESP32, or Raspberry Pi footprints.
Launch the free Windows app from the Microsoft Store, click “Detect Board”, and let the AI suggest the appropriate firmware template. The app will also generate a minimal upload script that you can test on a spare microcontroller before committing to the production unit.
Safety evaluation
Map all moving parts and label any pinch points, exposed gears, or high‑temperature zones. Use a laser distance meter to record clearance around the work envelope; the Carpathron Avatar (available on Meta Quest 3/3S) can stream a live view of the robot’s camera, letting you virtually walk around the machine while keeping your hands safe.
Check emergency stop wiring. If the original circuit is hard‑wired to a single relay, plan to insert a Carpathron safety I/O module that mirrors the stop signal to both the legacy controller and the new robot controller. Verify that the stop response occurs within 100 ms by triggering the button and observing the LED status on the Carpathron board.
Tip: Document every measurement and wiring diagram with a photo and a short caption. When you later import the data into the Carpathron Robotics & Coding app, the AI can reference those notes to suggest the most compatible firmware version.
Consulting support
Qubitpage offers engineering consultancy to validate your audit results. Send the collected PDFs and photos to contact@qubitpage.com; a senior engineer will review mechanical tolerances, confirm the chosen communication protocol, and advise on any additional safety relays required.
After the review, the consultant can provide a concise retrofit plan that aligns the legacy hardware with the Carpathron ecosystem, ensuring a smooth transition from manual operation to AI‑assisted control.
Choosing the right robotics kit for your machine
Understanding the two core kits
The Carpathron ecosystem offers two distinct starter kits that can be integrated with legacy equipment. The Baby Carpathron ESP32‑CAM robot car is a compact platform built around an ESP32‑CAM module and communicates through the open Carpathron Robot Protocol (HTTP + MJPEG). It is ideal for applications that require a lightweight mobile carrier, such as moving parts along a conveyor or providing visual inspection at fixed stations.
The Muse Carpathron agent runs as a Windows service on Meta Muse hardware. It exposes a WhatsApp text/voice interface and can be paired with the Carpathron Avatar app on Meta Quest 3/3S for immersive tele‑operation. This kit suits scenarios where a stationary robot needs high‑level interaction, for example a pick‑and‑place arm that an operator can guide by voice or headset orientation.
Hardware considerations
- Form factor. The Baby Carpathron is a small wheeled chassis; it fits into tight spaces and can be mounted on existing frames. The Muse agent requires a Meta Muse base, which is larger but provides built‑in processing power and sensor suite.
- Connectivity. Both kits use the Carpathron Robot Protocol, but the Baby Carpathron relies on Wi‑Fi for HTTP streams, while the Muse agent adds WhatsApp cloud messaging for text and voice commands.
- Power supply. The ESP32‑CAM board runs on 5 V from a USB‑type source, making it easy to tap into an existing machine power rail. The Muse unit draws from a standard PC power supply and needs a Windows host to run the agent.
Software integration
Both kits can be programmed with the AI‑assisted desktop application available on the Products page. After installing the Carpathron Robotics & Coding app from the Microsoft Store, users can detect the ESP32‑CAM board or the Muse hardware, generate firmware snippets, and upload them directly from the UI. The AI agent also suggests command structures for the robot protocol, reducing the need for low‑level coding.
For the Baby Carpathron, the workflow typically involves:
- Connecting the ESP32‑CAM to the machine’s network.
- Using the AI app to scan for the board and generate a basic MJPEG streaming endpoint.
- Embedding the HTTP URL into the machine’s PLC or SCADA system for visual feedback.
For the Muse agent, the steps are:
- Installing the Windows service on a PC attached to the Meta Muse.
- Configuring WhatsApp integration through the AI app’s wizard.
- Activating the Carpathron Avatar on a Quest headset to enable head‑controlled steering.
Choosing based on retrofit goals
If the primary aim is to add visual monitoring and simple motion to an existing conveyor, the Baby Carpathron ESP32‑CAM robot car provides the fastest path to deployment. Its low cost, minimal footprint, and straightforward HTTP interface make it a practical retrofit component for most SMEs.
When the retrofit requires interactive control, voice commands, or immersive supervision, the Muse Carpathron agent delivers a richer user experience. Its integration with WhatsApp and the Quest avatar enables operators to intervene without leaving the shop floor, which can be valuable for complex assembly or quality‑check stations.
Both kits share the same open protocol, so a mixed deployment is possible: a Baby Carpathron unit can feed video to a Muse‑controlled station, creating a layered automation layer that scales as the production line evolves.
Step‑by‑step retrofit workflow
- Mount the Carpathron ESP32‑CAM module on the machine frame using the supplied brackets. Connect power to the 5 V rail and route the USB cable to the nearest controller slot.
- Attach a compatible Arduino or ESP32 board to the sensor array (limit switches, proximity sensors, or encoders). Secure the wiring with zip ties and verify continuity with a multimeter.
- Launch the Carpathron Robotics & Coding Windows app from the Microsoft Store. Use the AI‑assisted board detection feature to identify the newly installed board and let the assistant generate a starter firmware sketch.
- Review the generated sketch in the built‑in editor, then click “Upload”. The app compiles the code and flashes it to the board over the USB connection, handling driver installation automatically.
- Open the Carpathron Avatar on a Meta Quest 3 device and pair it with the ESP32‑CAM robot. Turn your head to steer the camera view and confirm that the live MJPEG stream shows the machine’s moving parts.
- Start Carpathron Remote on a second workstation. Add the robot’s IP address, enable WhatsApp text control, and monitor the firmware logs in real time while the machine runs a test cycle.
- Run a short production test: trigger the machine via the remote UI, observe sensor feedback on the Carpathron Avatar, and adjust PID parameters directly from the AI‑assisted console if the motion is uneven.
- Document the final firmware version, upload the configuration file to the internal server, and label the hardware with a QR code that links to this workflow for future maintenance.
Tip: Keep the Carpathron Robotics & Coding window open while tweaking parameters; the AI assistant can suggest optimal values based on the live sensor data you see in Carpathron Remote.
Cost comparison: retrofit vs. replacement
When a small‑to‑medium enterprise evaluates whether to retrofit an existing machine or purchase a new one, the first step is to map the major cost drivers. Hardware upgrades typically involve adding a controller board—such as an Arduino, ESP32, or Raspberry Pi—and the necessary sensors or actuators. Software licences for a robotics platform are modest compared to the perpetual licences required for many commercial PLC suites. Labour costs depend on the complexity of the integration and the skill level of the technician.
In contrast, a brand‑new machine bundles the controller, firmware, and warranty into a single price tag. The upfront expense is higher, but the vendor usually includes installation and a period of on‑site support. The following table summarises typical cost ranges observed in recent retrofit projects that used the Carpathron Robotics & Coding app for firmware generation and the Baby Carpathron ESP32‑CAM robot for proof‑of‑concept testing.
| Item | Retrofit cost (USD) | New machine cost (USD) | Notes |
|---|---|---|---|
| Controller board (Arduino/ESP32/Raspberry Pi) | 50 – 150 | — | Available from electronics distributors; compatible with Carpathron app. |
| Sensors & actuators (limit switches, encoders, motor drivers) | 100 – 300 | — | Selection guided by the robot’s task; no proprietary licences required. |
| Software tooling (Carpathron Robotics & Coding desktop app) | Free (Microsoft Store) | Included in new machine price | Free app provides AI‑assisted firmware generation and upload. |
| Labour (engineer integration, testing, documentation) | 500 – 1,200 | 1,000 – 2,500 | Retrofit labour is lower when the existing mechanical structure is sound. |
| Downtime during installation | 1 – 2 days (lost production) | 3 – 5 days (vendor commissioning) | Shorter downtime reduces indirect costs for retrofits. |
| Warranty & support | 6 months (self‑support, community forums) | 12 months (vendor warranty) | Extended support can be purchased separately if needed. |
Adding the line items together, a typical retrofit project ranges from USD ≈ 700 to USD ≈ 1,800, while a comparable new machine often starts at USD ≈ 2,500 and can exceed USD 5,000 for specialized tooling. The cost gap widens when the existing equipment has a long service life and only requires electronic upgrades.
Beyond pure dollars, enterprises should weigh the intangible benefits. Retrofitting preserves the original machine’s footprint, avoids the need for new floor space, and leverages the operator’s familiarity with the existing controls. For many SMEs, the combination of lower capital outlay and faster ROI makes retrofitting the financially prudent choice.
Maintaining and scaling your retrofitted line
Routine maintenance with AI assistance
After a retrofit, schedule weekly checks using the Carpathron Robotics & Coding app. The AI agent can scan the connected Arduino, ESP32 or Raspberry Pi boards, verify firmware versions, and suggest updates. When the agent detects a mismatch, it prompts you to download the latest firmware directly from the app and re‑upload it to the device.
Remote diagnostics through the Carpathron ecosystem
The Carpathron robotics suite includes a Windows‑based agent that runs on Meta Muse models. By enabling WhatsApp text or voice control, operators can request status reports from any robot on the shop floor. The agent returns sensor readings and logs, allowing technicians to pinpoint issues without leaving their workstation.
Keeping AI models current
Qubitpage offers a managed hosting service for the AI models that power the Carpathron Robotics & Coding assistant. The service automatically pulls model updates from the Qubitpage GitHub repository and redeploys them to the Windows agent. This ensures that the AI continues to recognize new board types and coding patterns as they become available.
Scaling the retrofitted line
When you add additional machines, install the same Carpathron agent on each new controller and register it in the central management console. The console aggregates diagnostics from all agents, making it easy to roll out firmware updates or new AI capabilities across the entire line with a single click.
Maintenance plans
Qubitpage provides structured maintenance plans that include regular AI model refreshes, priority support, and quarterly health checks of the robotics agents. Details are available on the services page, where you can choose a plan that matches your production schedule.
Frequently asked questions
How much time does a typical retrofit take?
Retrofitting an older machine usually requires a site survey, hardware installation, and software configuration. For a single‑axis actuator the whole process can be completed in one to two days, while a multi‑axis robot may need three to five days of work. The exact duration depends on the existing control architecture and the complexity of the integration.
Can AI agents work on machines that have no digital interface?
Yes. The Carpathron Robotics & Coding agent can detect physical connection points such as Arduino or ESP32 boards that are added to legacy equipment. By attaching a small microcontroller to the machine’s control panel, the AI agent can generate firmware, upload it, and then communicate with the hardware through standard serial or GPIO lines.
What safety standards must be met after adding a robot?
Any retrofit that introduces moving parts must comply with the relevant ISO standards, such as ISO 10218‑1 for industrial robots and ISO 12100 for risk assessment. In addition, local machine‑safety directives require emergency stop functions, safety‑rated sensors, and clear signage. A documented risk analysis should be performed before commissioning the robot.
Is remote monitoring possible for retrofitted equipment?
Remote monitoring can be enabled by using the open Carpathron Robot Protocol, which streams MJPEG video and exposes HTTP endpoints for status queries. By connecting the robot’s ESP32‑CAM module to the plant network, operators can view live footage and read sensor data from any web browser. Integration with existing SCADA systems is achieved through simple HTTP GET requests.
What financing options exist for the retrofit hardware?
Qubitpage works with a network of distributors that offer leasing or pay‑as‑you‑go plans for the Carpathron hardware. Companies can also apply for equipment‑finance loans from banks that specialize in SME technology upgrades. In some regions, government grants for automation projects may cover a portion of the retrofit cost, provided the solution meets the stated productivity goals.
Next steps for retrofitting your SME’s machines
Begin by mapping the existing control logic of each machine and identifying the interfaces that can accept digital signals – most legacy PLCs expose simple I/O ports that can be driven by a low‑cost microcontroller. Purchase an ESP32‑CAM or a comparable board, flash it with the open Carpathon Robot Protocol, and connect the I/O pins to the machine’s start/stop relays. Use the Carpathron Avatar app on a Meta Quest headset to view the camera feed and verify that the robot’s actions match the intended sequence.
Next, install the Carpathron Robotics & Coding Windows agent on a workstation that will act as the central hub. Run the AI‑assisted firmware wizard to generate the necessary code for the ESP32‑CAM, then upload it directly from the app. Test the control loop by sending simple commands through WhatsApp voice messages, confirming that the robot car responds reliably.
Finally, document the new communication flow, train operators on the WhatsApp control syntax, and schedule a weekly check of the firmware updates via the Carpathron agent. When the system runs smoothly, expand the setup to additional machines, gradually building a modular utility network.
Ready to start the upgrade? Explore our retrofit services and let Qubitpage guide your transition.