When you start a robot project you need a controller that matches the required processing power, connectivity and ease of programming.
The direct answer: use ESP32 for lightweight, wireless bots, Raspberry Pi for vision‑heavy or Linux‑based tasks, and Arduino for reliable, low‑latency control.
How to decide which board meets your robot’s needs
Choosing a microcontroller or single‑board computer for a robot starts with a clear view of the tasks the robot must perform. A line‑following bot that only needs to read a couple of sensors and drive two motors can thrive on a modest MCU, while a vision‑guided drone that runs neural‑network inference will require a full Linux environment. The first step is to list the functional requirements and then map them to the board characteristics that matter most.
Processing power and real‑time requirements
Robotic control loops often run at 100 Hz or faster. Boards with a dedicated hardware timer and deterministic interrupt latency, such as the Arduino family, excel at tight real‑time loops. The ESP32 offers a dual‑core Tensilica processor that can run a lightweight RTOS, providing enough headroom for sensor fusion and modest AI inference without sacrificing timing. Raspberry Pi models host a multi‑core ARM CPU under Linux; they are ideal when you need a full OS, high‑level libraries, or GPU‑accelerated workloads, but you must manage non‑deterministic scheduling with care.
I/O density and peripheral support
Count the digital, analog, PWM, and communication pins your robot will use. Arduino boards typically expose 14‑20 digital I/O pins with several analog inputs, making wiring straightforward for motor drivers, servos, and encoders. The ESP32 doubles the number of GPIOs and adds hardware SPI, I²C, UART, and capacitive touch channels, which simplifies connecting multiple sensors and wireless modules. Raspberry Pi provides a 40‑pin header with GPIO, I²C, SPI, and UART, but fewer analog inputs; you often need an external ADC for analog sensors.
Connectivity options
Wireless communication is a decisive factor for many robots. The ESP32 integrates 2.4 GHz Wi‑Fi and Bluetooth LE, allowing direct OTA firmware updates and remote control via a smartphone or a messaging service. Arduino boards can add Wi‑Fi or BLE with shields or companion modules, but this adds cost and complexity. Raspberry Pi includes built‑in Ethernet and Wi‑Fi (on most models) and can run a full networking stack, making it suitable for streaming video or handling HTTP APIs.
Power consumption and battery life
Battery‑powered robots benefit from low‑power MCUs. The ESP32 can enter deep‑sleep modes consuming under 10 µA, extending runtime for mobile platforms. Arduino Uno‑class boards draw a few milliamps in idle, while more powerful variants like the Arduino Due consume more. Raspberry Pi models typically draw 2‑5 W, which shortens battery life unless a high‑capacity pack is used.
Community support and ecosystem
A vibrant community reduces development time. Arduino’s 15‑year history yields extensive libraries, tutorials, and forum support for motor control, sensor integration, and debugging. ESP32 benefits from both the Arduino ecosystem (via the Arduino core) and the Espressif SDK, offering a rich set of examples for Wi‑Fi, BLE, and low‑power operation. Raspberry Pi’s large Linux community provides ready‑made packages for computer vision, machine learning, and ROS integration. When you need board‑specific help, searching the robotics section of Qubitpage’s site reveals guides that reference each platform.
By weighing processing power, I/O, connectivity, power draw, and community resources against your robot’s functional goals, you can narrow the field to the board that balances capability with simplicity. The next sections explore each platform in detail, followed by a practical walk‑through of setting up Carpathron Robotics & Coding with the chosen board.
ESP32: Low‑cost Wi‑Fi and Bluetooth for simple bots
The ESP32 is a dual‑core microcontroller that integrates 2.4 GHz Wi‑Fi and Bluetooth LE in a compact package. It runs at up to 240 MHz, provides 520 KB of SRAM and supports a range of peripherals such as PWM, ADC, I²C and SPI, making it suitable for lightweight sensor processing and motor control. Because the chip is inexpensive—often under $5 in bulk—it is a popular choice for hobbyist robots that need wireless connectivity without the overhead of a full operating system.
Typical robot use‑cases
Simple line‑following or obstacle‑avoidance bots can use the ESP32’s built‑in PWM channels to drive small DC motors directly, while reading distance sensors via ADC. For swarm robotics, the Bluetooth LE stack enables peer‑to‑peer communication, allowing dozens of units to exchange status updates without a central hub. When a robot must report telemetry to a cloud dashboard, the Wi‑Fi stack can push JSON payloads to an MQTT broker or HTTP endpoint, keeping the code footprint under 100 KB.
Another common scenario is remote control via a smartphone. The ESP32 can host a lightweight web server that serves a control page, letting users steer the robot from a browser. This approach eliminates the need for a separate radio module and leverages the same Wi‑Fi network used for firmware updates.
Integration with Carpathron Robotics & Coding
Carpathron Robotics & Coding, available free on the Microsoft Store, includes an AI‑assisted board detection feature that recognises ESP32 devices when they are connected via USB. After detection, the app can generate starter firmware based on natural‑language prompts, compile the sketch, and upload it directly to the board. This workflow removes the manual steps of installing the ESP‑IDF toolchain or configuring Arduino‑IDE settings.
To use the ESP32 with Carpathron, connect the board to a Windows PC, launch the Carpathon agent, and select “Detect Board”. The app will list the ESP32 alongside other supported platforms such as Arduino and Raspberry Pi. Choose the “Generate Firmware” option, describe the desired behaviour (e.g., “read ultrasonic sensor and send distance over MQTT”), and let the AI produce the code. Once the build succeeds, click “Upload” and the firmware is flashed in seconds.
Tip: Keep the ESP32’s firmware size below 1 MB to ensure fast OTA updates when using Carpathon’s wireless upload feature.
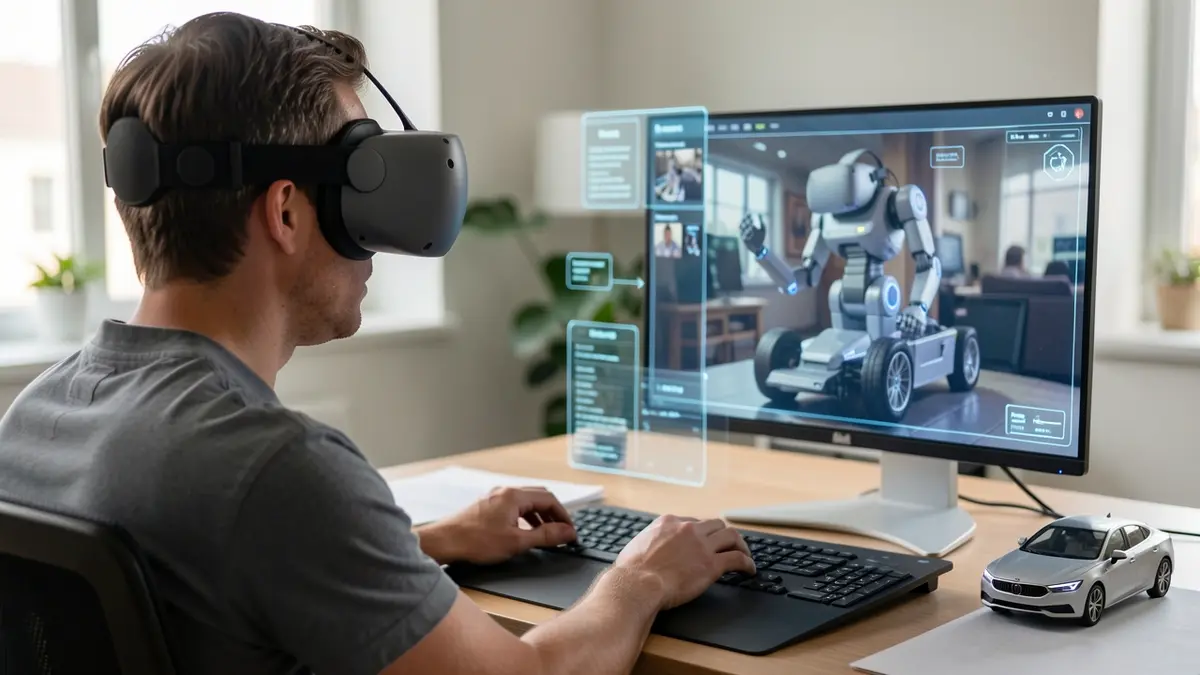
Because the Carpathon agent runs on Windows, you can also pair the ESP32 with the Carpathon Avatar on Meta Quest 3/3S. After uploading firmware, launch the Avatar app, point the headset at the robot, and use head‑tilt gestures to steer the bot while viewing the live MJPEG stream from the ESP32‑CAM module. This visual feedback loop is especially useful for debugging sensor placement without needing a separate monitor.
For developers who prefer a command‑line workflow, the same AI‑generated code can be exported from Carpathon and compiled with the ESP‑IDF or Arduino‑CLI tools. This flexibility lets you move from rapid prototyping in the Windows UI to a fully scripted build pipeline for production runs.
Overall, the ESP32’s blend of low cost, built‑in wireless, and seamless integration with Carpathron Robotics & Coding makes it an ideal platform for simple, connected robots that need real‑time actuation and remote monitoring.
Arduino: Real‑time control and beginner‑friendly development
Deterministic I/O handling
Arduino boards excel at real‑time digital and analog I/O because the microcontroller runs a single‑threaded loop without an operating system. This architecture guarantees that pin changes are processed within microseconds, which is essential for motor drivers, ultrasonic sensors, and servo controllers. For a line‑following robot, the Arduino can read two infrared sensors and adjust motor PWM signals on each iteration of loop(), keeping latency below 1 ms.
Extensive library ecosystem
The Arduino IDE ships with a curated library manager that indexes thousands of community‑maintained packages. Libraries such as AccelStepper, Servo, and Adafruit_NeoPixel provide ready‑made functions for stepper control, precise servo positioning, and LED strip animation. Installing a library requires only a few clicks, after which the code can be compiled and uploaded directly from the IDE. This reduces the time spent writing low‑level drivers and lets hobbyists focus on robot behavior.
Carpathron Robotics & Coding auto‑detection
The Carpathron Robotics & Coding Windows app includes an AI‑assisted workflow that scans the USB ports for connected Arduino boards. When an Arduino is detected, the app displays the board type (e.g., Uno, Nano, Mega) and offers a list of compatible firmware templates. Selecting a template launches a guided editor where the AI suggests code snippets based on the robot’s intended tasks, such as obstacle avoidance or line tracking.
After the user confirms the generated sketch, the app compiles the code with the Arduino toolchain and uploads it to the board with a single click. The process works the same way for ESP32 or Raspberry Pi boards, but the Arduino path benefits from the smallest binary size and the quickest upload cycle, often under five seconds.
Integrating Arduino with Carpathron robot platforms
Carpathron’s open Robot Protocol runs over HTTP, and an Arduino can act as a lightweight server using the ESPAsyncWebServer library (compatible with ESP32‑based Arduinos). By exposing endpoints such as /cmd or /status, the robot’s camera feed from the Baby Carpathron ESP32‑CAM can be requested by a remote controller or the Carpathron Avatar app on Meta Quest. The Arduino then parses incoming commands and drives motor drivers via PWM pins, completing the control loop.
Because the Arduino handles only the time‑critical I/O, higher‑level tasks—speech recognition, path planning, or cloud analytics—can be offloaded to a companion device like a Raspberry Pi or a Windows PC running Carpathron Robotics & Coding. This hybrid approach preserves deterministic control while leveraging more powerful processors for complex algorithms.
Getting started quickly
To begin, download Carpathron Robotics & Coding from the Products page and install the Windows package. Connect the Arduino via USB, launch the app, and click “Detect Board.” Choose the “Basic Motor Control” template, answer the AI prompts about wheel diameter and motor driver type, and press “Generate & Upload.” The robot will respond to the first command issued from the Carpathron Avatar or a WhatsApp text message, demonstrating the end‑to‑end workflow without writing a single line of code.
Raspberry Pi: Full Linux environment for advanced robotics
Powerful processor and graphics core
The Raspberry Pi 4 Model B ships with a quad‑core Cortex‑A72 CPU clocked at 1.5 GHz and a VideoCore VI GPU. This combination delivers enough compute for multi‑threaded control loops, sensor fusion, and real‑time decision making. The GPU can accelerate OpenGL ES and Vulkan, which is useful when rendering camera feeds or visualizing robot state on a connected display.
Because the board runs a full Linux distribution, developers can install standard packages such as python3-picamera or libopencv-dev directly from the repository. The operating system also supports hardware‑accelerated video decoding, allowing MJPEG streams from Carpathron ESP32‑CAM robots to be processed with minimal CPU load.
Running vision and AI libraries
OpenCV, TensorFlow Lite, and PyTorch are all available for the Raspberry Pi’s ARM architecture. Installing OpenCV with sudo apt-get install libopencv-dev python3-opencv gives immediate access to image filtering, object detection, and feature tracking. For lightweight AI inference, TensorFlow Lite can run models compiled for the ARM‑v8 CPU, enabling tasks such as line‑following or obstacle avoidance without an external accelerator.
When combined with the Carpathron Robotics & Coding Windows app, the Raspberry Pi is recognized as a target board. The AI agent can suggest firmware snippets, generate Python scripts for camera handling, and even upload the code via SSH. This integration reduces the manual steps typically required to set up vision pipelines on a Linux board.
Connectivity and peripheral support
Four USB‑type A ports, a Gigabit Ethernet jack, and built‑in Wi‑Fi (802.11ac) give the Raspberry Pi multiple pathways to communicate with sensors, motor drivers, and cloud services. The 40‑pin GPIO header provides direct access to PWM, I²C, and SPI buses, which are essential for low‑level motor control and interfacing with lidar or IMU modules.
Power can be supplied through a USB‑C connector, allowing the board to be mounted on a robot chassis with a regulated 5 V supply. The same power rail can feed a small USB camera, a USB‑Lidar, or a USB‑to‑UART adapter for serial communication with auxiliary microcontrollers.
Software workflow with Carpathron tools
Start by installing the Raspberry Pi OS Lite image and enabling SSH. After connecting the board to the same network as your Windows workstation, launch Carpathon Robotics & Coding from the Microsoft Store. The app will detect the Raspberry Pi on the network, list its IP address, and offer to generate a starter project that includes a basic camera capture loop.
Once the code is generated, the AI assistant can suggest improvements such as adding a TensorFlow Lite model for object classification. After confirming the changes, the app uploads the script via SCP and triggers a remote execution command, letting you test vision processing on the robot in real time.
Tip: Use the Raspberry Pi’s built‑in hardware video decoder (V4L2) to offload MJPEG stream decoding from the CPU. This keeps more processing cycles available for AI inference and reduces latency in closed‑loop control.
For further integration examples, see the Carpathron robotics page, where the Raspberry Pi is listed alongside Meta Muse models and ESP32‑CAM bots.
Step‑by‑step: Setting up Carpathron Robotics & Coding with your board
Carpathron Robotics & Coding is a free Windows app that helps you detect an ESP32, Arduino, or Raspberry Pi board, generate firmware with AI assistance, and upload the code in a few clicks. Follow the numbered guide below to get a robot running on any of the three platforms.
- Download and install the app. Open the Microsoft Store page at Carpathron Robotics & Coding and click
Get. After installation, launch the program from the Start menu; the first screen shows a brief welcome message and aDetect Boardbutton. - Connect your board to the PC. Plug the USB cable of your ESP32, Arduino, or Raspberry Pi into a USB‑A port. Windows should install the required driver automatically; you can verify the connection in Device Manager under Ports (COM & LPT). Return to the app and press
Detect Board; the detected board type and COM port appear in the status pane. - Select a project template. In the left navigation, choose Robotics →
New Project. Pick the template that matches your hardware – for example, “ESP32‑Car” or “Arduino‑Arm”. The app loads a minimal firmware skeleton and displays it in an editable code view. - Ask the AI to generate or extend code. Highlight the portion of code you want to modify and click the
AI Assistbutton. In the prompt window, type a short instruction such as “add line‑following sensor handling” or “create a Wi‑Fi connection to my network”. The AI returns ready‑to‑use C/C++ snippets that you can insert with a single click. - Compile and verify the firmware. Click
Buildin the toolbar. The app runs the appropriate compiler (Arduino‑CLI for Arduino, ESP‑IDF for ESP32, or GCC for Raspberry Pi) and shows any errors in a console pane. Resolve warnings if needed, then pressBuildagain until the message Build succeeded appears. - Upload the firmware to the board. With the board still connected, press
Upload. The app flashes the compiled binary over the detected COM port. A progress bar indicates the transfer; when it reaches 100 % you see “Upload complete”. - Test the robot. Open the
Controltab and use the on‑screen joystick or voice commands via WhatsApp (if you have a Meta Muse model). The robot should respond according to the AI‑generated code. If the behavior is unexpected, return to step 4 to refine the logic. - Save and share your project. Click
Save Projectto store the source files in the defaultCarpathronProjectsfolder. Use theExportbutton to generate a ZIP archive that can be shared with teammates or uploaded to the Qubitpage GitHub repository (github.com/qubitpage).
After completing these steps you have a functional robot running code that was partially written by AI, all without leaving the Windows environment. For further customization, explore the Carpathron Avatar app on Meta Quest 3/3S, which lets you steer the robot by turning your head.
Feature comparison table: ESP32, Arduino, Raspberry Pi
The three most common controllers differ markedly in processing power, memory, and connectivity options. Understanding these differences helps you match a board to the robot’s mechanical complexity and required autonomy. Below is a quick reference that highlights the key specifications relevant to most hobbyist and educational projects.
| Feature | ESP32 | Arduino (e.g., Uno) | Raspberry Pi 4 Model B |
|---|---|---|---|
| CPU | Dual‑core Tensilica LX6 @ 240 MHz | ATmega328P @ 16 MHz (8‑bit) | Quad‑core Cortex‑A72 @ 1.5 GHz |
| RAM | 520 KB SRAM (internal) + up to 4 MB external PSRAM | 2 KB SRAM | 2 GB, 4 GB or 8 GB LPDDR4 |
| Connectivity | Wi‑Fi 802.11 b/g/n, Bluetooth 4.2 LE, optional Ethernet via external PHY | USB (programming), optional shields for Wi‑Fi, Ethernet, or Bluetooth | Gigabit Ethernet, 2× USB‑3.0, 2× USB‑2.0, 2× micro‑HDMI, built‑in Wi‑Fi 802.11ac, Bluetooth 5.0 |
| Power draw (typical) | 80–260 mA active, deep‑sleep < 5 mA | 50 mA (5 V) without peripherals | 2.5–3.5 A at 5 V under load |
| Typical robot tasks | Wireless sensor nodes, line‑following bots, low‑latency motor control with Wi‑Fi telemetry | Real‑time PWM motor control, simple obstacle avoidance, basic servo actuation | Computer vision, SLAM, multi‑camera streaming, AI inference, complex navigation stacks |
| Price range (USD) | $4‑$12 | $20‑$30 | $35‑$75 for base model, higher for 8 GB variant |
When you pair a board with Carpathron Robotics & Coding, the AI‑assisted firmware wizard automatically detects ESP32, Arduino, or Raspberry Pi hardware. The app then generates the appropriate code skeleton, uploads it, and offers real‑time debugging. For projects that need a camera feed, the Baby Carpathron ESP32‑CAM robot car uses the same HTTP‑based Carpathron Robot Protocol that the Raspberry Pi can also serve, making integration straightforward.
Choose ESP32 if you need low‑cost wireless connectivity and modest processing. Opt for Arduino when deterministic timing and simple I/O are paramount. Select Raspberry Pi for tasks that require a full Linux stack, such as image processing or networked multi‑robot coordination. Matching the board’s strengths to your robot’s mission reduces development friction and improves reliability.
Frequently asked questions
What are the main differences between ESP32 and Arduino for motor control?
The ESP32 includes two 32‑bit cores, built‑in Wi‑Fi and Bluetooth, and hardware PWM channels that can drive motor drivers directly, which reduces the need for external shields. Arduino boards such as the Uno rely on an 8‑bit AVR MCU and typically require a motor driver shield or external PWM circuitry to achieve comparable control resolution. For simple DC or stepper motors, both platforms work, but the ESP32 can handle higher‑frequency PWM and wireless telemetry without additional modules.
Can I run Python on an ESP32 for robot logic?
Yes, the ESP32 supports MicroPython, a lightweight implementation of Python that runs directly on the chip. After flashing the MicroPython firmware, you can write robot logic in .py files, access GPIO pins, and communicate over Wi‑Fi or BLE using standard libraries. While MicroPython is slower than native C/C++ code, it is sufficient for many sensor‑fusion and control tasks on small robots.
Is Raspberry Pi overkill for a line‑following robot?
A line‑following robot typically needs fast digital I/O, simple PID control, and occasional sensor reading, which can be satisfied by an ESP32 or Arduino. The Raspberry Pi provides a full Linux environment, HDMI output, and powerful CPU cores, which are unnecessary for basic line tracking and add extra power consumption. Unless you plan to add computer‑vision processing or network services, a single‑board microcontroller is usually more efficient.
How does Carpathron Robotics & Coding help with firmware updates?
Carpathron Robotics & Coding is a Windows desktop AI agent that can detect connected boards such as Arduino, ESP32, or Raspberry Pi. The app scans the USB ports, identifies the board type, and offers to generate or edit firmware code with AI assistance. Once the code is ready, the agent uploads the firmware to the board in a single click, streamlining the update process for multiple robots.
Which board offers the best battery life for outdoor robots?
The ESP32 is designed for low‑power operation, featuring deep‑sleep modes that can reduce current draw to a few microamperes, making it ideal for battery‑powered outdoor robots. Arduino boards like the Uno consume more power in active mode and lack built‑in power‑management features, while the Raspberry Pi runs a full Linux stack that typically draws hundreds of milliamps even when idle. Selecting the ESP32 and programming appropriate sleep cycles will extend runtime the most.
Choosing the right controller for your robot
For simple line‑following or sensor‑driven projects, an Arduino board remains the most straightforward choice. Its low power draw, extensive library support, and deterministic timing let you get a prototype moving in minutes. When you need built‑in Wi‑Fi, Bluetooth, or more processing headroom without leaving the microcontroller family, the ESP32 offers a compelling upgrade while keeping the same Arduino‑compatible development flow.
If your robot requires full‑size Linux, multi‑threaded vision pipelines, or heavy on‑board computation, the Raspberry Pi provides a desktop‑class environment. It runs a standard OS, supports USB cameras, and can host complex AI models directly on the board. The trade‑off is higher power consumption and a steeper learning curve for hardware interfacing.
In practice, match the controller to the robot’s core tasks: sensor acquisition and actuation → Arduino; wireless connectivity and modest AI assistance → ESP32; intensive perception, navigation, or edge AI → Raspberry Pi. Whichever platform you select, the Carpathron ecosystem can help you generate and upload firmware quickly, thanks to the AI‑assisted Carpathron Robotics & Coding app.
Ready to prototype your next robot? Explore the full range of Carpathron tools on our robotics page.